FAQ » How To Get A Virtual Phone Number In TeleCMI?
How To Get A Virtual Phone Number In TeleCMI?
- Step 1: Sign-up and log in to TeleCMI virtual phone system

- Go to our website www.telecmi.com and click the sign-up or a similar button to create your free business phone system account.
- After landing on the sign-up page, enter basic details like business name, email address, and password in the form to finish your sign-up process.
- Once sign-up process is completed, you will be taken to our virtual phone system dashboard for registering your virtual business number.
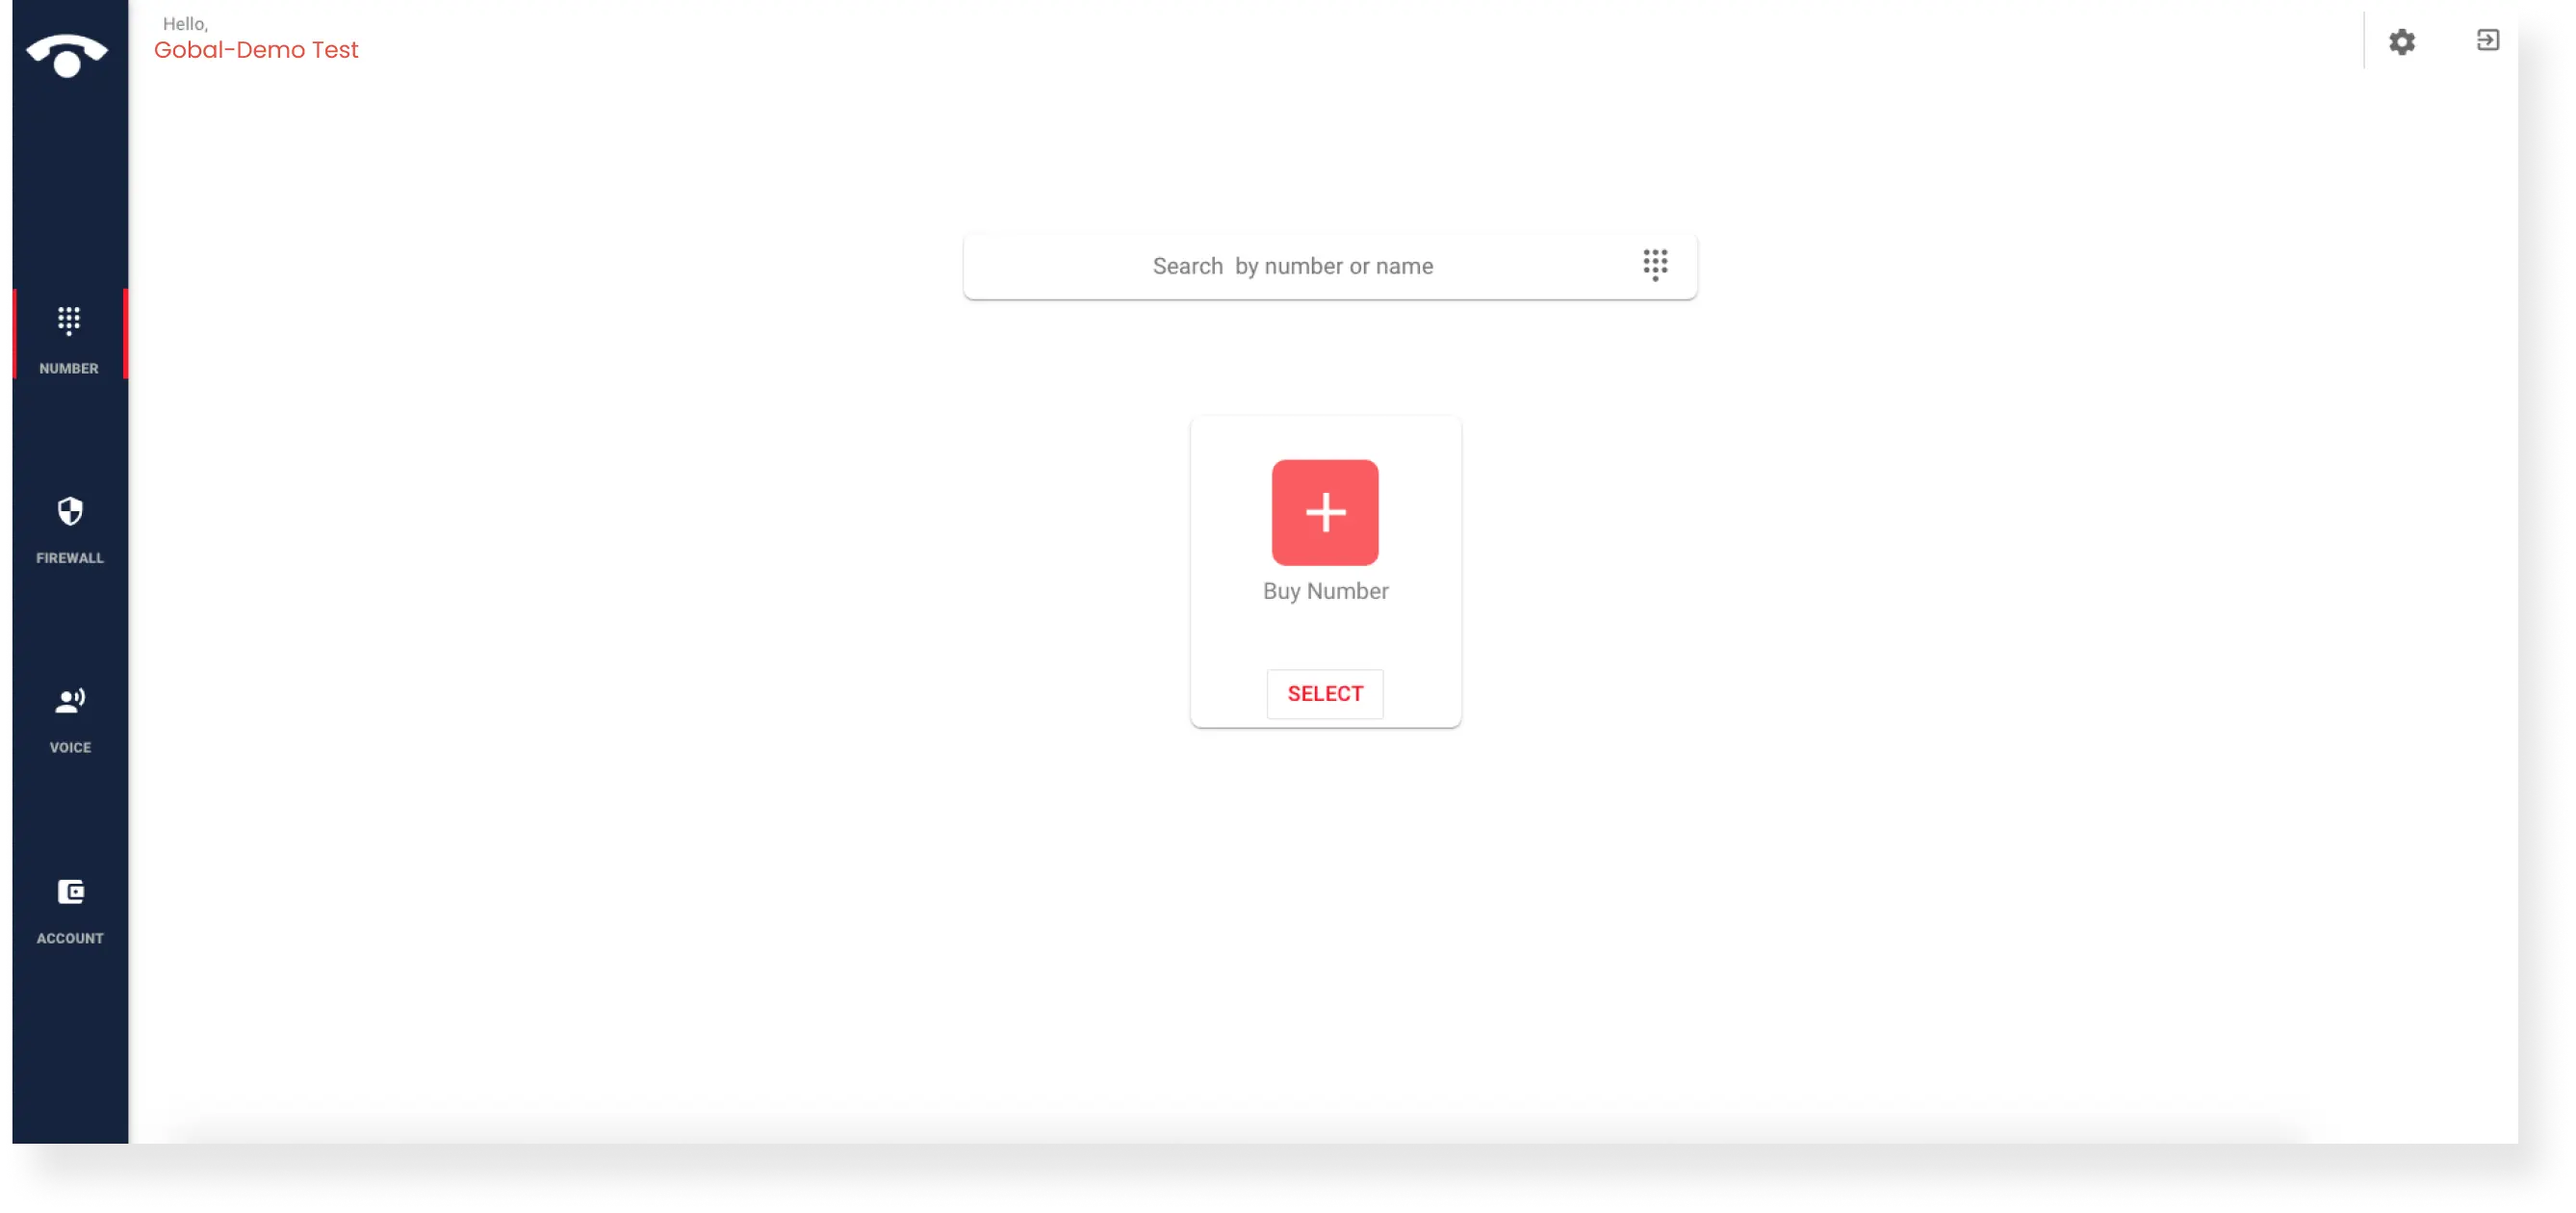
- Step 2: Click ‘Buy number’ in the dashboard
- In the TeleCMI dashboard, click ‘buy number’ icon to continue to the next step.
- Step 3: Select the country and click next
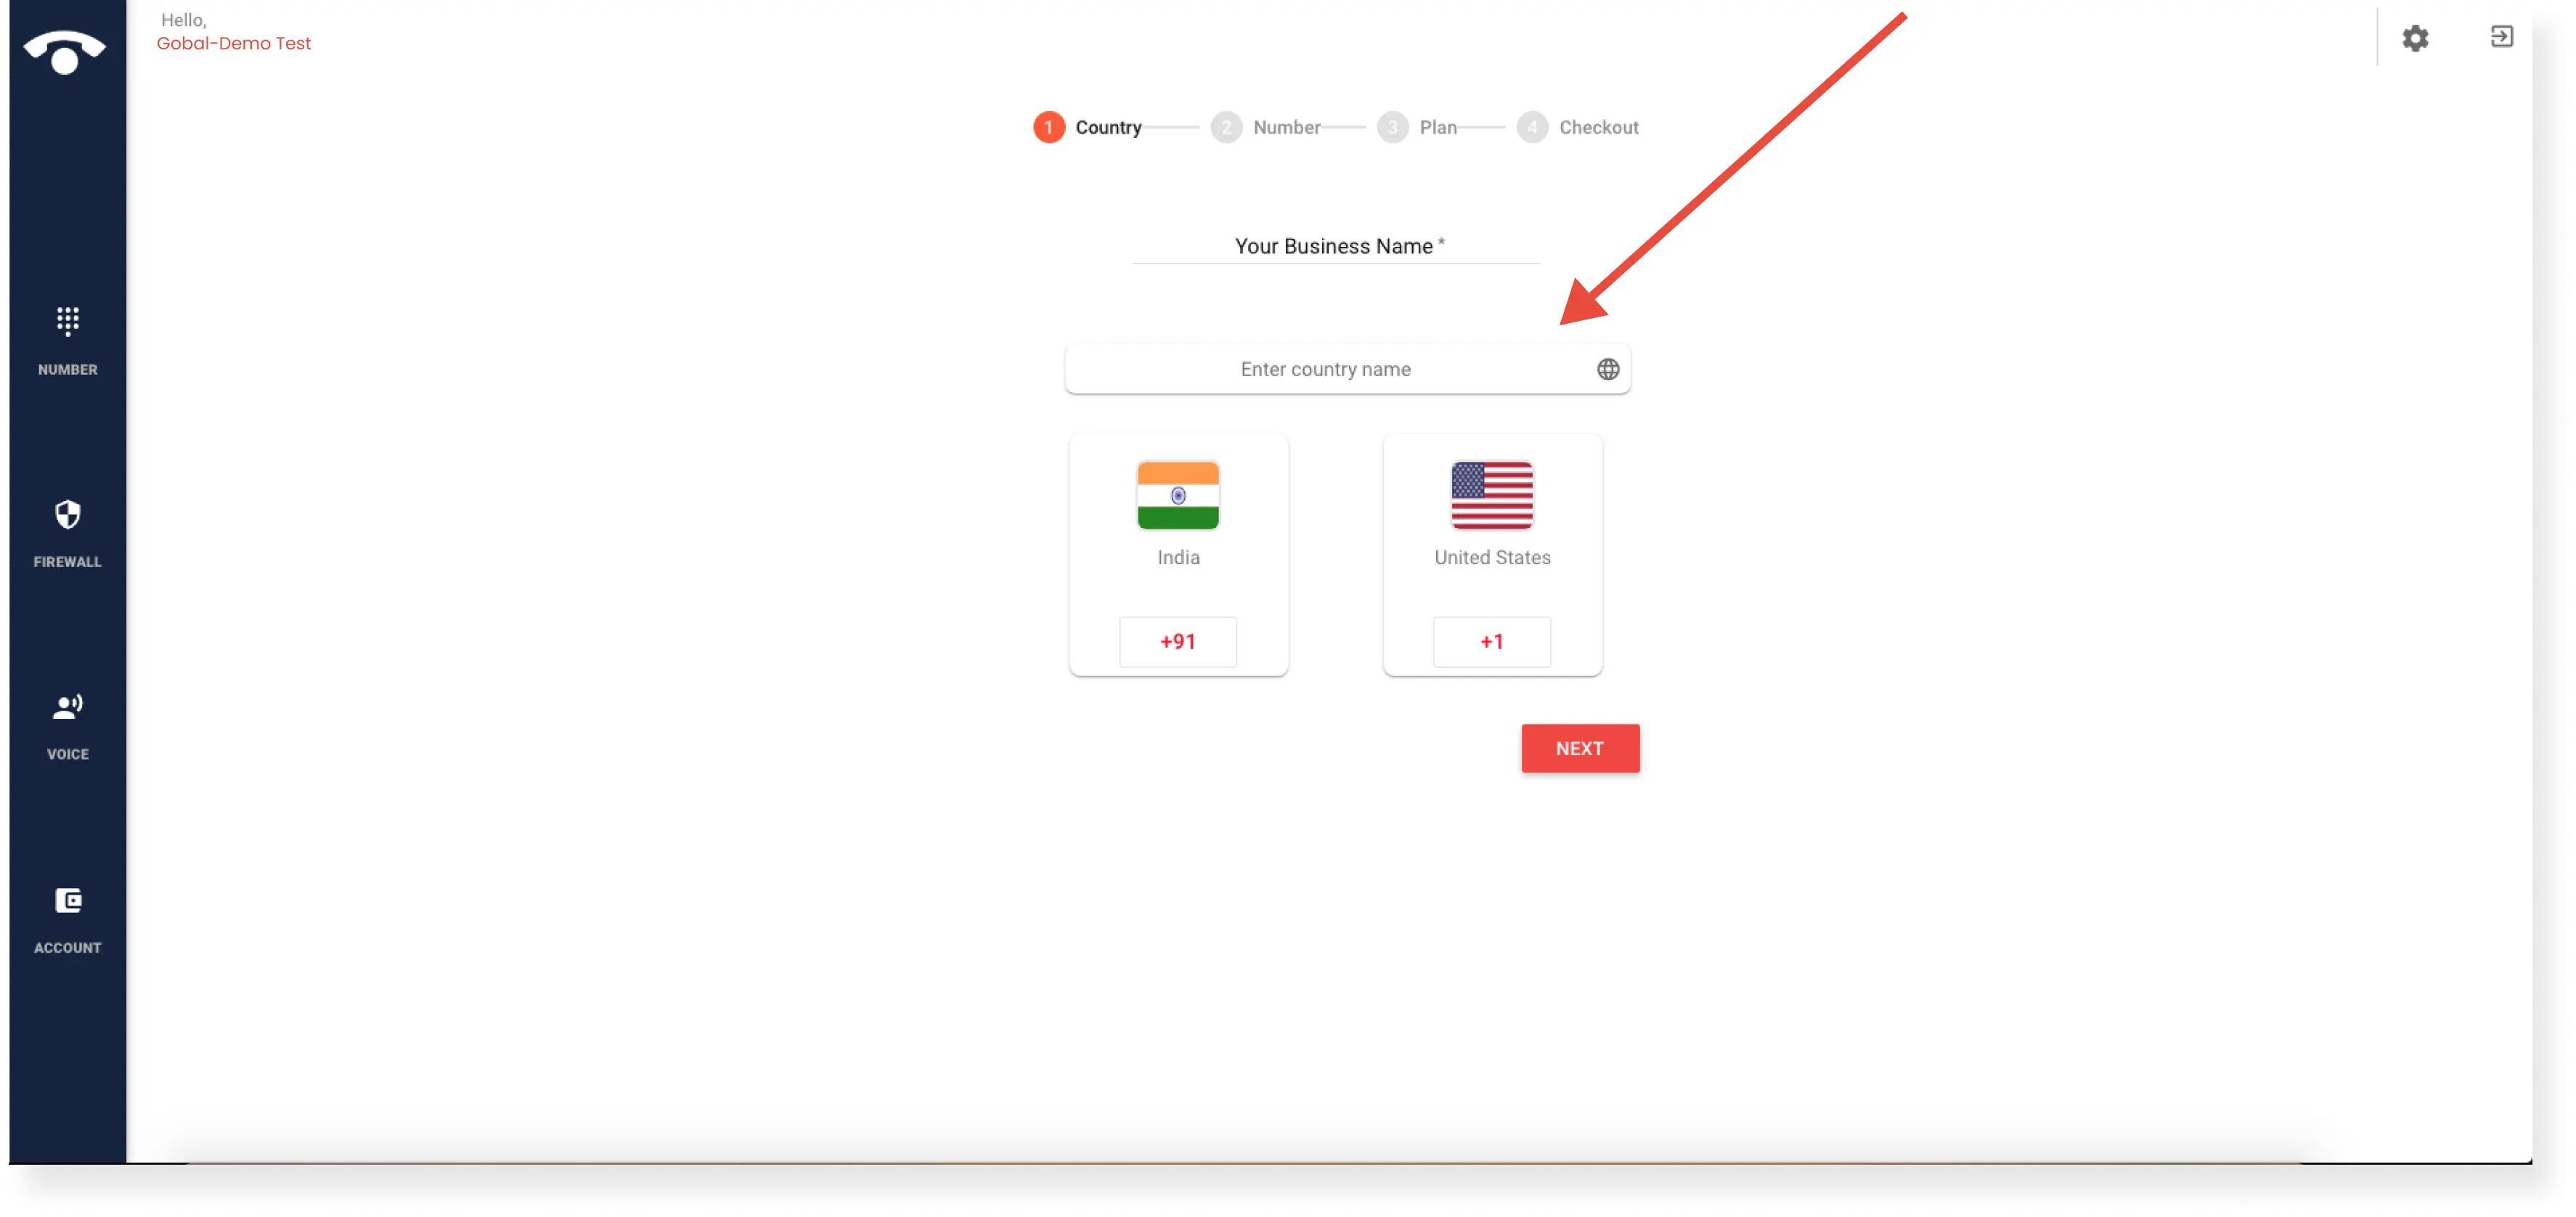
- Enter the business name in the required field and fill in the country name of your choice that you need a virtual number.
- When you enter the country, the widget with the country flag and code will appear if virtual numbers are available for that country.
- For example, if you need to buy an Indian Virtual Number, then enter India in the form and select the Indian widget to continue to the next steps.
- And then, Select the country and click ‘next’.
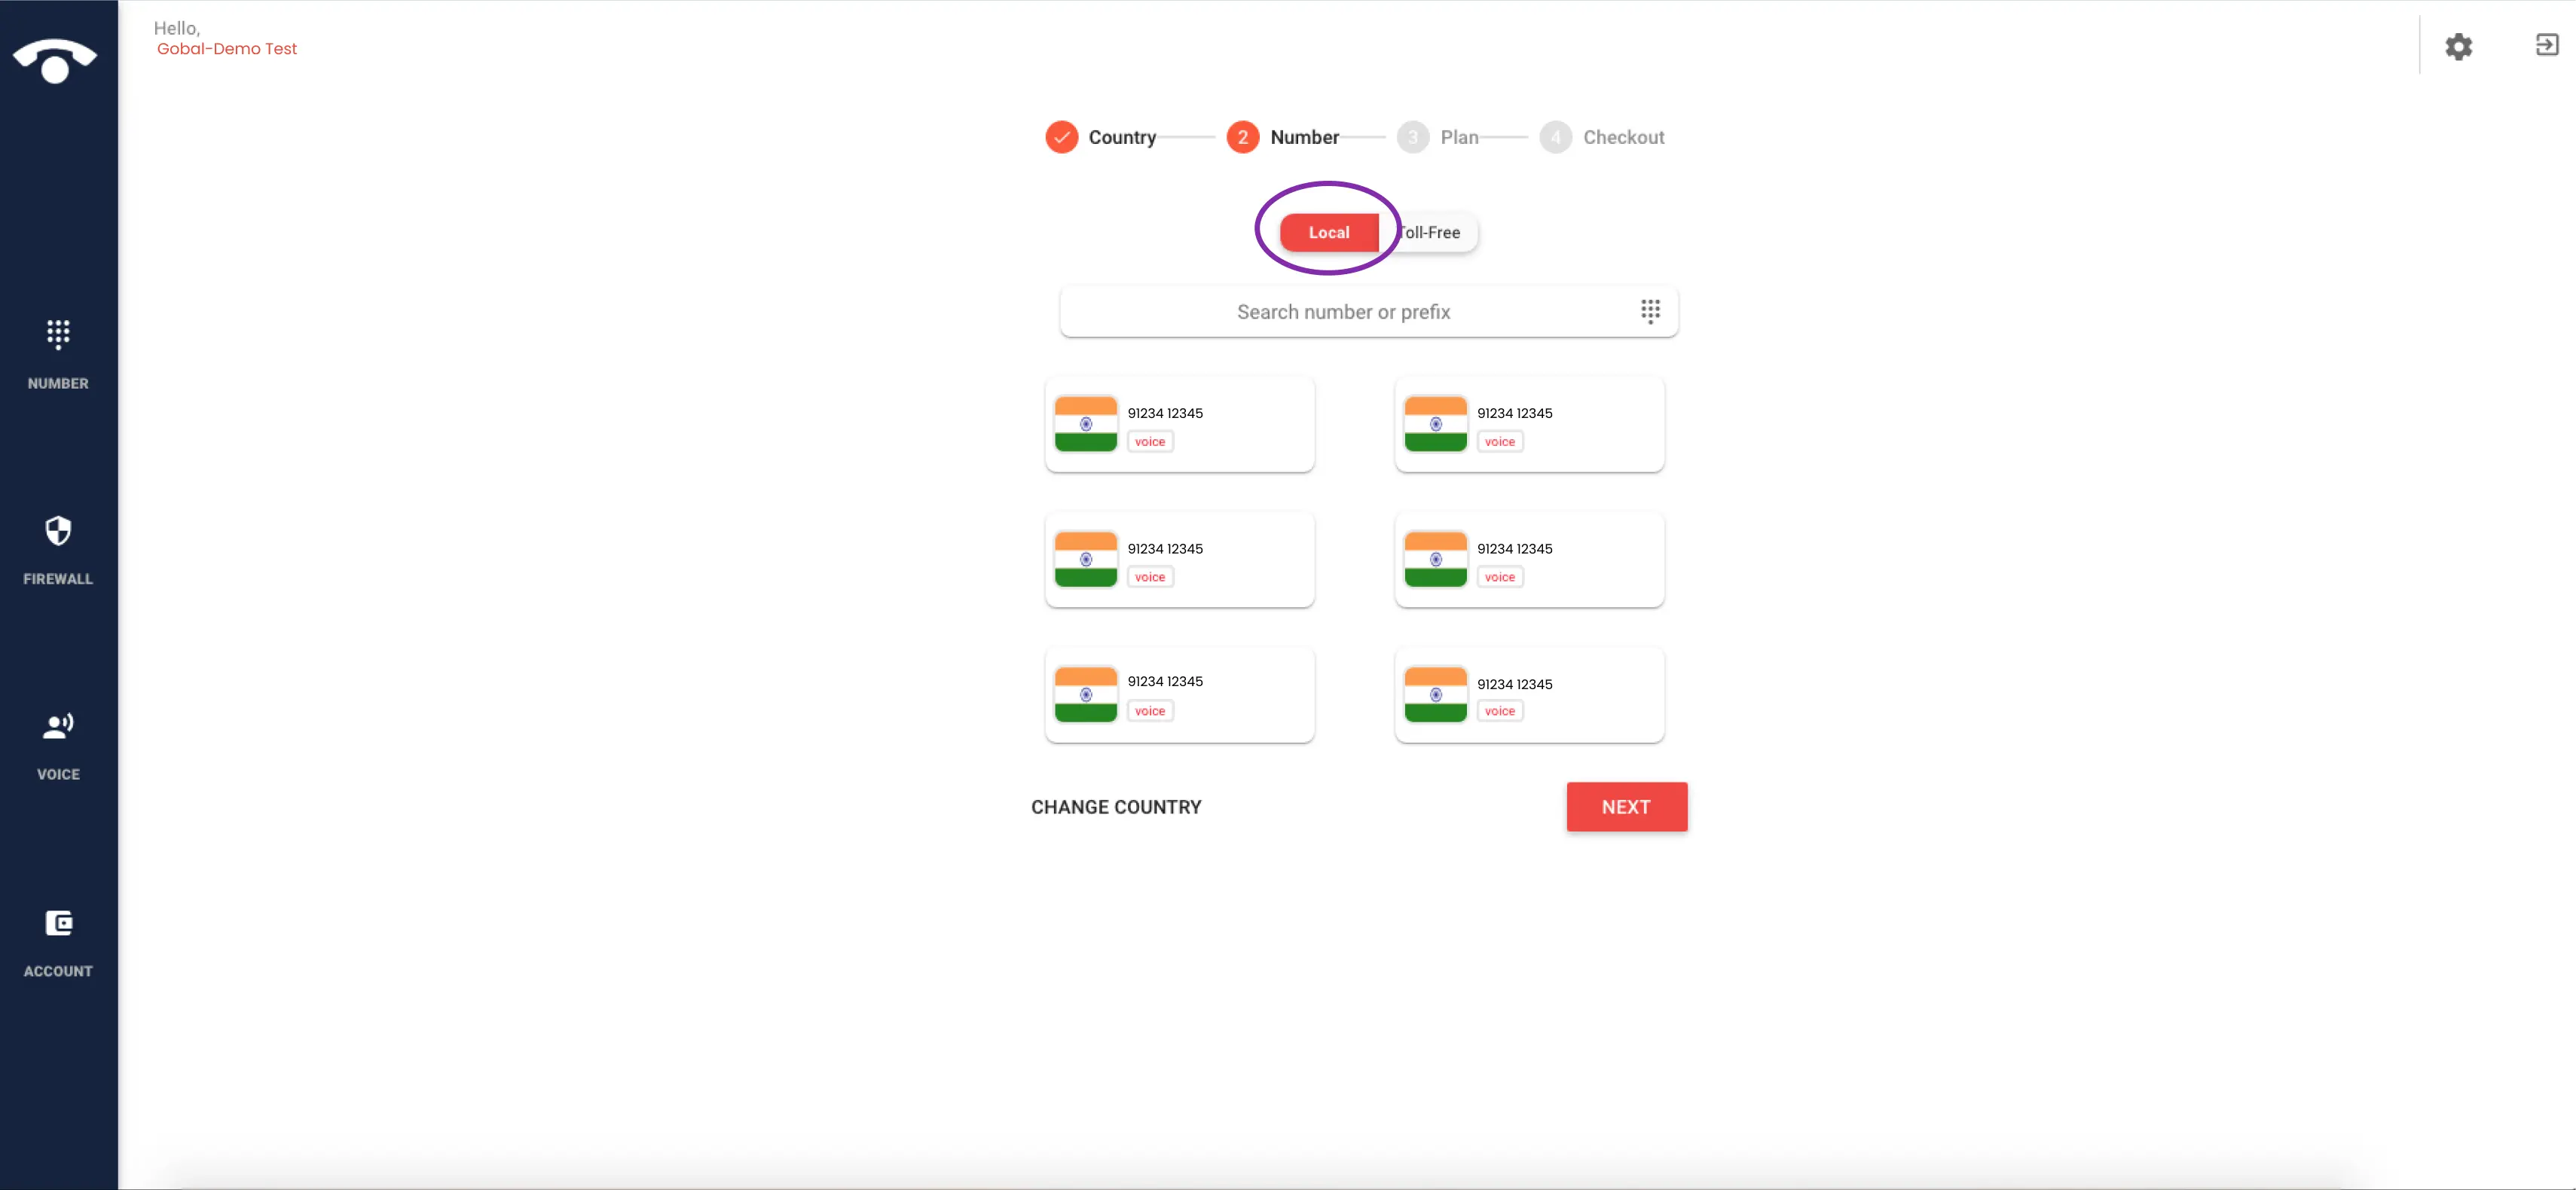
- Step 4: Select your number and click ‘next’
- The list of local virtual numbers will appear for the selected country, you can choose any virtual number of your choice and click ‘next’.
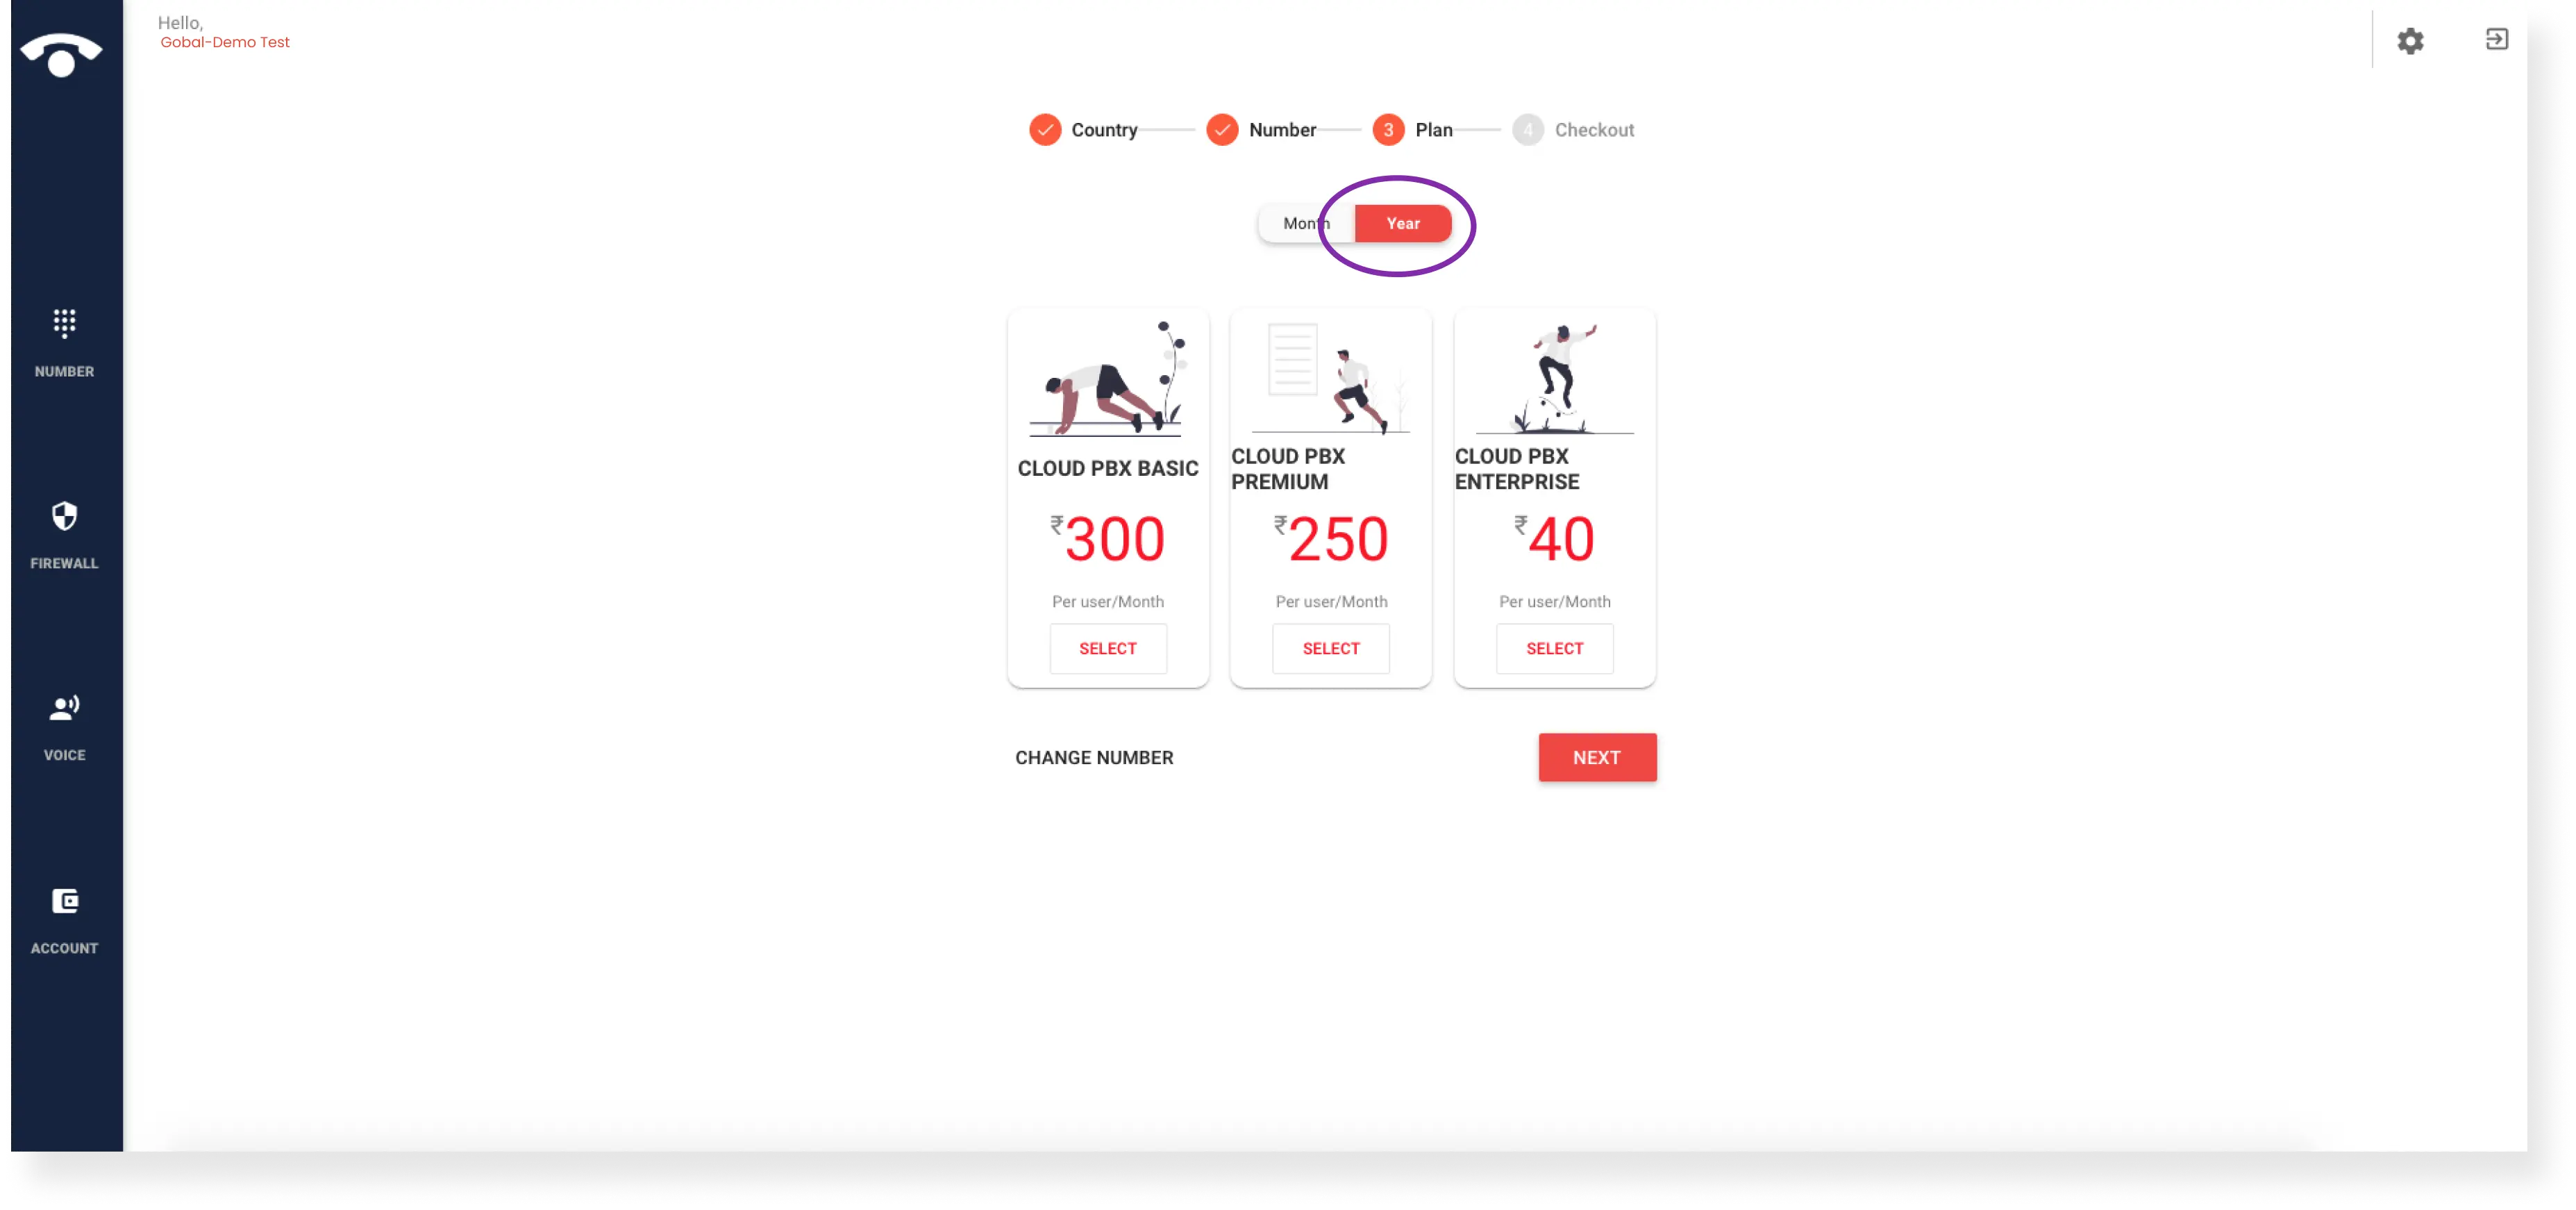
- Step 5: Select a plan and click ‘next’
- After choosing your desired number, you are prompted to the next step for buying voice plans.
- Pick any voice plan under the ‘select a plan’ section that fits your business communication needs and click ‘next’.
- You are also given options to choose either a monthly or yearly plan. When you choose the yearly option, you will get an extra discount on your selected voice plan.
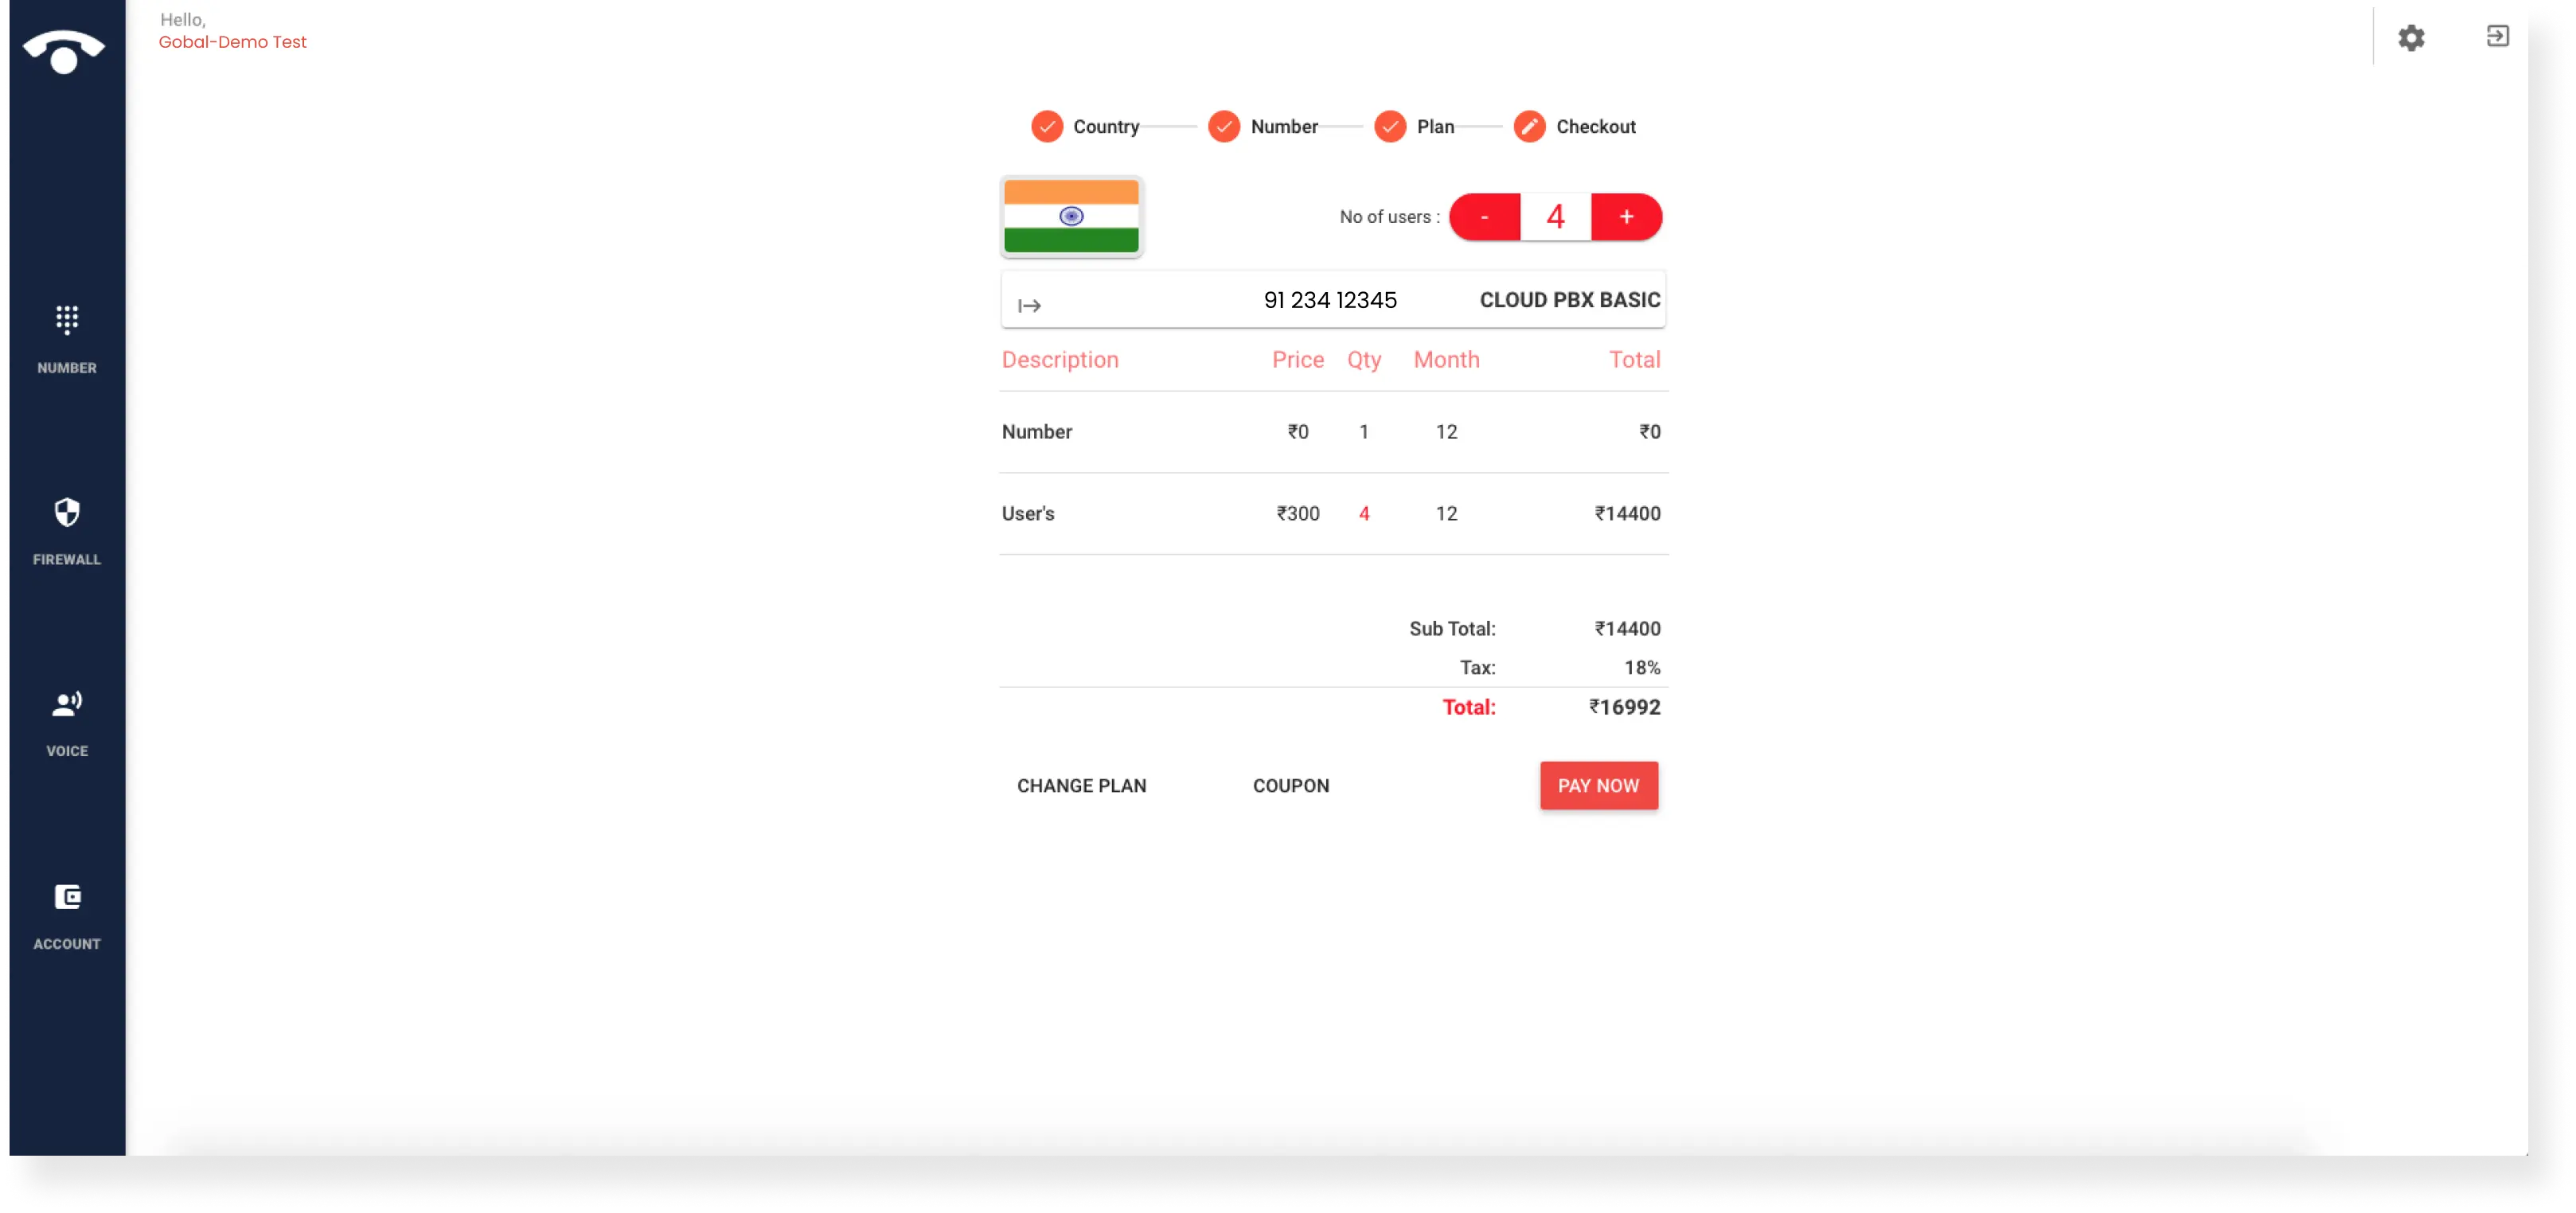
- Step 6: Pay and complete the checkout
- And the final step is to checkout and pay for the plan that you have purchased.
- Review the plan details in the checkout process and click ‘pay now’ to complete your number registration process.
- Note: You can also call us for setting up your virtual number and guide you through all the processes involved.
- This is how registering and buying virtual phone numbers works in TeleCMI business phone system platform.